Edited to add: We are sad to announce that this will be our last challenge for an indefinite period. The QKR Stampede and Eureka Stamps brands are up for sale and, until a new buyer is found, the challenges will be on suspension. Neither can QKR Stampede/Eureka Stamps sponsor any outside challenges until a new buyer takes over since there is no website available for viewing or choosing the prize images.
Welcome to our Anything Goes Challenge!
We will have a new challenge on the 1st and the 15th of each month.

Thank you to everyone who participated in our challenge. We had a wonderful turnout.
The team had an awesome time visiting your blogs to see your creativity in action. Fabulous job!!!
We will select two winners each week; 1 using a QKR Stampede
or Eureka Stamps image and 1 using any image.
We're playing catch up from the 2 Challenges,
#464 and #465 where winner selection was paused while
the old store closed and the new store opened.
We appreciate your patience and all three Winners
are list here this morning!
Starting with
Our Winners For Challenge #464
QKR Stampede or Eureka Stamps Image Winner
NONE (sniff, sniff, rubbing tears out of our eyes)
Any Image Winner
#38 Helen

Congratulations!
Please email NanaConnie at qkrstampedenc@gmail.com with the words
"QKR Challenge Winner" in the Subject Line.
Also, don't forget to grab the "Winner" Badge from our side bar for your blog!!
Our TOP 5 PICKS for this week are:
.#8 Carol Gill
.#9 Elizabeth H
.#19 Andrea n
.#28 Ileana
.#43 Elle-Jeanne
Congratulations!
Please grab the Top 5 Badge from our side bar to display on your blog.
Our Winners For Challenge #465
QKR Stampede or Eureka Stamps Image Winner
#9 Deanne S

Please visit our QKR Stampede Store & Pick out the 3 digital Images of your Choice.

Please visit our QKR Stampede Store & Pick out the 2 digital Images of your Choice.
Congratulations!
Please email NanaConnie at qkrstampedenc@gmail.com with the words
"QKR Challenge Winner" in the Subject Line.
Also, don't forget to grab the "Winner" Badge from our side bar for your blog!!
Our TOP 5 PICKS for this week are:
.#8 Lori P
.#12 Donna E
.#15 Ellapu (Elaine)
.#17 Mia
.#28 Billie A
Congratulations!
Please grab the Top 5 Badge from our side bar to display on your blog.
Our Winners For Challenge #466
QKR Stampede or Eureka Stamps Image Winner
Please visit our QKR Stampede Store & Pick out the 3 digital Images of your Choice.

Please visit our QKR Stampede Store & Pick out the 2 digital Images of your Choice.
Congratulations!
Please email NanaConnie at qkrstampedenc@gmail.com with the words
"QKR Challenge Winner" in the Subject Line.
Also, don't forget to grab the "Winner" Badge from our side bar for your blog!!
Our TOP 5 PICKS for this week are:
.#1 Beebeebabs
.#17 Cathy
.#22 Donna W
.#29 Carol G
.#44 Annie H
Congratulations!
Please grab the Top 5 Badge from our side bar to display on your blog.
Our challenge theme is always
Anything Goes
Here is some inspiration from our Design Team.
Faith using Weighing & Bunny with Bow


.jpg)


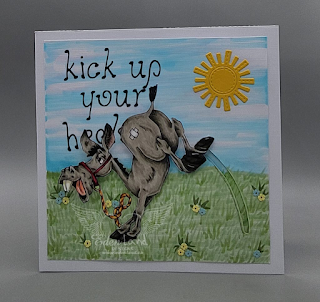
Michael T. using Hitching A Ride, Hi, and Quote Balloon

NanaConnie using "Birthday Gator"
(Yes, I know it's a Hippo but it's named 'Gator' by mistake!)
.JPG)
For full details on the designers' cards, you can click on their name which is linked to their blog. We love to hear from you, so you are always welcome to visit. We would love to receive your comments.
Reminder:
To play along with us, please post a direct link to the card/project on your blog
using Inlinkz and link back to our challenge from your blog.
You can join in as many other challenges with ours as you like.
You can only enter our challenge a MAXIMUM of 3 times per challenge.
Please do NOT backlink to other cards you have previously posted.
Crafty Hugs from QKR Stampede team.


.jpg)

